Creating Your Form
In your MiniPro (or EDI-Pro) program, open the case that you wish to create a form for. (For detailed instructions on how to find and open a case in MiniPro, refer to the Basic MiniPro Instruction manual). Click on the Attachments/Forms tab. You will see a list of forms on the right side of the case, under the Send All button.
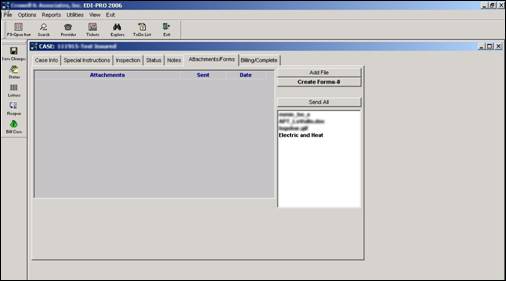
Double click on the name of the form you wish to create and it will create it as an attachment in the Attachments/Forms tab.
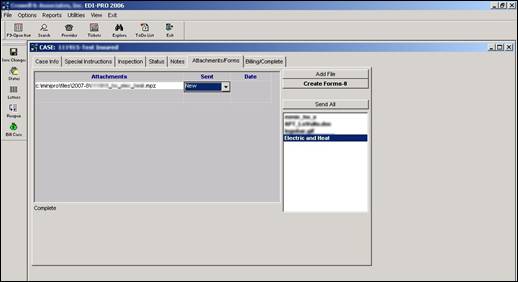
To
open the newly-created form, double-click on the attachment name (under the
heading Attachments).
Entering Information
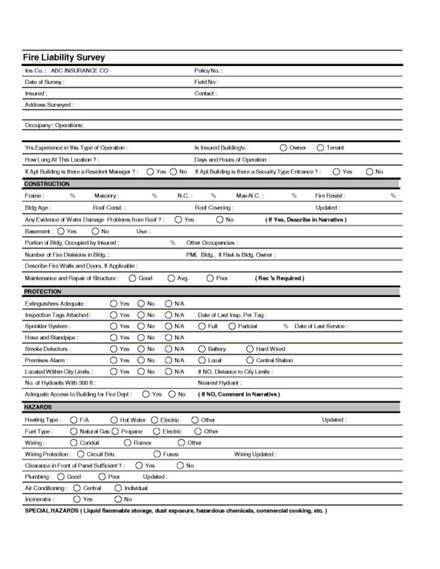
Once you have opened your newly-created form it will look similar to the one pictured below:
Special instructions, if any, pop up so you don’t have to go back to the case and look.
The forms, for the most part, are simple to fill in, requiring only selection from a drop-down box of options or entering information into a field. In some areas, however, you will see a small button named *rec.
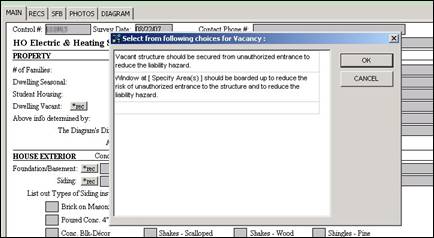
*Rec (Recommendation) Button
![]() If the form question has a *rec
button, click on that button to view the recommendation choices available for
that question.
If the form question has a *rec
button, click on that button to view the recommendation choices available for
that question.
Additional Forms
If you need to add an additional form, click on the Forms menu heading at the top of the form and a dialog box will appear, giving you the choices to create a Diagram page, a Photos page, or an additional Form.
Photo Page
You may create a photo page by clicking on the Forms menu heading and selecting Photo. A new “Photo” tab will show at the top of the form. Click on the tab to go to the photo page. If you are adding more than six photos, create another photo page.
Using Photo Manager
Double click in the white area or go up to the top to get Photo Manager. Checkmark the box next to Load Thumbnails to enable photo compression.
Adding and Removing Directories
First you’ll need to add the Directory (or folder location) for your photos. Right-click in the Photo Manager and select Add Directory. Navigate to where your photos are located and double click on the folder.
If you wish to remove a Directory, select the directory in Photo Manager by clicking once to highlight it, then right-click in the Photo Manager and select Remove Directory.
Viewing your Photos
In the Photo Manager, double click on the directory you want to open and your photos will load.
Hint: The Photo Manager shows five photos at once. A time-saver while searching photos is to click on the first one to see the first five photos displayed. Then click on the 6th photo to see the next five displayed, and so on.
Photo Too Large
If a photo is too large for the form it will say Photo Too Large across the top. If so, click on the Compress Photo button and it will change to Compressed across the top. Another solution is to reset your camera to take “email size” or compressed photos.
Adding and Removing Photos from the Photo Page
If you click on a smaller thumbnail photo it will load into the larger window. From there you can drag-and-drop it into your photo page by clicking on it, holding down your mouse key, dragging the photo over to the photo page blank and releasing the mouse.
If you wish to delete a photo from the photo page, right-click on the photo, go to Properties and select Clear Photo.
On the photo page you may type in a caption or description in the long green caption bar under each photo.
Saving Your Form
When you are done with your form click Save. If there is something not completed on the form a message will come up and remind you as you save and exit.